Monday, August 8, 2011

whole wheat blueberry pancakes

so cute!
This recipe comes from Rocco DiSpirito's book Now Eat This! these are made with whole wheat pastry flour, which i have used a few times now and really like! It's protein content is lower than whole wheat flour, which enables it to acheieve that lighter, fluffier texture that you'd want for say, pancakes or a muffin. Whole wheat flour is still fine for more heavy duty breads and doughs, and I have even used it in my oatmeal chocolate chip cookies--it was delicious!

one note about this recipe--i would probably add a bit of cinnamon to really perk the flavor up, and at the time I didn't have stevia, so i kind of threw in a random (not enough) amount of Splenda, so they were quite as sweet as i would have liked. i think this can be easily solved, and i have invested in Sweet Leaf stevia. (i first tried it in my coffee at work, thanks A&F cafe!!) it's sweet and natural, but does have a slight aftertaste. Katie, from dashingdish.com recommends NuStevia, which she says she likes best of all the varieties she has tried. I will try that next, you can find it on Amazon if you're interested. (Stevia is an all natural, no calorie sweetner for those of you who don't know what I am talking about)

serves 4 (8 mini pancakes each)

you will need:

    3/4 cup maple syrup (calls for Walden Farms which is calorie free, I used light Log Cabin)
    1 1/2 cups fresh/frozen blueberries
    1 1/2 cups whole wheat pastry flour
    3 1/2 tsp baking powder
    4 packets stevia (or you could try 1-1 1/2 tsp sugar too, as a guesstimate)
    1/2 tsp salt
    1 1/4 cups skim (i like 1%) milk
    1/2 cup liquid egg substitute (i measured 1/2 cup of egg, i think it was only 1 though)
    3 T canola oil

to prepare:

in a small saucepan, heat syrup and 1/2 cup of blueberries. heat over low heat, and mash the blueberries with a spoon to release their juices. warm through, set aside.

mix together flour, baking powder, stevia (or sugar), and salt.

whisk in milk, egg, and oil, just until combined. stir in remaining blueberries

heat your griddle or frying pan over medium/high heat (if water drops sizzle, its ready!) drop tablespoon-fulls of batter onto the pan surface, flipping once edges appear dry and bubbles form on the surface. this happens very quickly since they are so tiny so be watchful.

serve with blueberry syrup and a tall glass of iced milk! (which is the only way to drink milk with proper breakfasts!)

i'll include the nutrition info since it's in the book:

per serving:

calories: 292, fat: 12 grams (1g saturated fat, 7g monounsaturated, 3g polyunsaturated)., 1.5 mg cholesterol, 830 mg sodium, 39 g carbs, 5g fiber, 10 g protein

ice cream ice cream!!

dark chocolate ice cream
So, last week I made a life-altering decision that i am pretty sure will enrich and fulfill my summer nights forever. ....or for a long time.

yes, it's true. I bought a Cuisinart ICE-21 ice cream maker. and it is beautiful, and my new favorite toy! It doesn't require the fuss and mess of salt and ice, however you need enough freezer space to fit the bowl in for a good 12-16 hours. (it contains a liquid that freezes solid) my freezer is tiny and chock full of junk, and it still fit, so i am sure most people will have no problem fitting one in their freezer. It makes 1 1/2 quarts of ice cream, which I loved because it's enough to enjoy for a few weeks but it's not so much that i need to go purchase a superfluous freezer to house all of my delicious creations.

the recipe i used was found via cooking light.com, and let me tell you, it was a winner.

you will need:

    1 1/3 cups sugar
    1/3 cup unsweetened cocoa (I used Hershey's Special Dark, hence the blackness of the ice cream)
    2 1/2 cups 2% reduced-fat milk, divided
    3 large egg yolks
    1/2 cup half-and-half
    2 1/2 ounces bittersweet chocolate, chopped (I had 85% dark chocolate on hand)

to prepare:


Combine sugar and cocoa in a medium, heavy saucepan over medium-low heat. Stir in 1/2 cup milk and egg yolks. Stir in remaining 2 cups milk. Cook 12 minutes or until a thermometer registers 160°, stirring constantly. Remove from heat.

Place half-and-half in a microwave-safe dish; microwave at high 1 1/2 minutes or until half-and-half boils. Add chocolate to half-and-half; stir until smooth. Add half-and-half mixture to pan; stir until smooth. Place pan in an ice-filled bowl. Cool completely, stirring occasionally.

Pour mixture into the freezer can of an ice-cream freezer; freeze according to manufacturer's instructions. Spoon ice cream into a freezer-safe container; cover and freeze 1 hour or until firm.

My ice cream maker froze this stuff to a soft-serve consistency in less than 20 minutes! Like magic.

           
yummy!
Check the link for nutritional info! (a bonus :) )

if you have an ice cream maker and love chocolate more than life, i suggest you make this immediately, so we can talk about how good it is! (by the way, you must eat this in a cone. like, must)


oh hi remember me?!

...maybe you don't. you know, since it's been...i don't know. a long time. months, eons, millenia. (i was pretty sure millenia was a word but its underlined in red....hmm)

it's been a busy time (sometimes), and sometimes i've been lazy. mostly, just lazy.

but i have been cooking! i'll break it up in a few posts so as not to overwhelm my 2 readers.

first up, zucchini noodle lasagna from Dashing Dish!

zucchini lasagna


anyway, you may remember me mentioning this dish in a previous post 
and i didn't have a picture then either. but it's super delicious, and well worth the effort! i would say it's not an easy dish, as the prep required is time consuming, but its so yummy that everyone should try it anyway.

when I re-attempted this dish, it was via Skype with my mom, we had a little cooking date and made it together :) It's not as good as being home with my family, but it's still nice to be able to see them and share meals together. 

you will need:

For the Noodles:
  • 6 large zucchini, cut lengthwise into 1/8 inch strips, should resemble thick lasagna type “noodles”
For the Meat Sauce:
  • 1.25 lb lean ground turkey meat (you could also leave this out and make to make a vegetarian version!)
  • 1 large onion, diced
  • 2 cups fresh or frozen broccoli (or 2 cups of another veggie of choice)
  • 2 cups fresh or frozen cauliflower (or 2 cups of another veggie of choice)
  • 2 cups fresh or frozen chopped spinach (or 2 cups of another veggie of choice)
  • 1 (25 ounce) jar of spaghetti sauce (I used one with 70 calories per 1/2 cup serving)
  • 1 tbs garlic powder (or 1 clove garlic, minced)
  • Pinch of salt and pepper, or to taste
  • *Optional seasoning: 2 tbs of Italian Seasoning
For the Cheese Layer:
  • 1 (16 ounce) container light cottage cheese (or light ricotta cheese)
  • 1/2 cup grated parmesan cheese
  • 3/4 cup shredded mozzarella cheese
to assemble:


  1. For the noodle layer: Preheat oven to 425 degrees. Spray a cookie sheet with non-stick cooking spray, arrange zucchini slices and season with salt and pepper. Bake zucchini slices for 5 minutes on each side, then remove from oven. Set zucchini slices aside and lower oven temperature to 375 degrees.
  2. For the meat sauce layer: In a large non-stick skillet, cook meat until it’s browned. To the skillet, add the veggies, seasonings, and the entire jar of spaghetti sauce. Simmer for about 10 minutes, (or until veggies are de-thawed/begin to soften), stirring occasionally.
  3. For the cheesy layer: Mix the cottage cheese and parmesan cheese together, ( this can be done right in the cottage cheese container!)
  4. Put it all together: Spray a 9×13 baking dish with non-stick cooking spray. Begin by spreading 1/3 of the meat sauce in the bottom of the pan. Follow meat sauce with a layer of zucchini slices, followed by a layer of cottage cheese. Repeat the layers until casserole dish is full.
  5. Finish it off: Sprinkle the mozzarella evenly over the top. Cover with foil and bake at 375 degrees for 1 hour.
  6. Remove foil and bake or broil another 5-10 minutes until cheese is browned. Remove from oven and let rest for about 10 minutes before slicing, and serve warm!
worth every minute of prep time! it freezes well (after being cooked), and since i made an entire 13x9 pan i froze about half the dish in individual containers for quick easy lunches. i love this dish because it's full of vegetables, has lots of cheesiness and rich flavor, and still has the feel of a traditional lasagna from the hearty meat sauce!


Sunday, June 12, 2011

deep, dark, delightful

dark chocolate cupcakes with dark chocolate frosting
i haven't actually made a new recipe or cooked a real meal since about the last time i posted. i did have a cooking date last week with my momma, and we made jambalaya via skype, but i forgot to photograph it. and honestly, it was delicious but it's brown. it doesn't look pretty. but i will still share the recipe, which as far as i'm concerned came from my grandmother.

i have made several pizzas, because my diet mostly consists of mozzarella, basil, olive oil, garlic and various carbs in many combinations. it just doesn't seem like something anyone cares to see 1000 times.

but around 11 pm last night i was needing to A. make something, i just needed to. B. eat some chocolate. like pronto. so i found the recipe for dark chocolate cupcakes i had been drooling over for a while from How Sweet It Is, but i needed a frosting recipe too. (i really wanted the total chocolate package) so i googled this recipe too.

they are awesome, almost too rich to finish just one. (i never think anything is too rich, pretty much ever) and both recipes were super easy and fast--always a plus when you're operating under chocolate induced psychosis. at midnight. on a saturday.

note: my first attempt at the cake mixture was a failure--i think my melted butter was too warm and my milk too cold, resulting in a weird, root beerish (foamy and bubbly) appearance...the butter formed teeny little balls.....weird. very weird. so i refrigerated it for a few minutes the second time and although the batter was thinner than i expected the cake turned out fine.

Chicken (or turkey) Jambalaya


you will need:


    2 TBL salad oil                                                
     ¼ tsp. thyme or marjoram or both
    1 cup green pepper, chopped                                    
     3 cups water (I used chicken stock)
    1 cup onion, chopped                                                
    1 ½ c uncooked rice (I used brown rice, which required a longer cooking time)
    1 clove garlic, minced                                                 
    1 to 2 cups cooked chicken or turkey (I poached chicken in stock, see above)
    2 tsp. salt                                                             
    1 to 2 cups cooked ham or sausage
    pepper to taste                                                             
    1 small can mushrooms (I omitted this)
    2 tsp.  (or more) Worcestershire


Heat oil and cook green pepper, onion, and garlic until tender.  Stir in seasonings and water and simmer 10 minutes.  Mix in rice, chicken or turkey, and ham or sausage.  Cook covered over low heat for 25 minutes or until rice done.  Add mushrooms with a little of their liquid.  Cook about 5 minutes longer.


If using brown rice, I'd check it after 40 minutes, stir it every so often during that time, and add more liquid if needed and continue cooking until rice is no longer "al dente" if you will.

Wednesday, May 11, 2011

baking

so the last 4 days have been full of flour, sugar, mixing, and...starting over. a lot.

i must have used a whole bag of flour. had to!

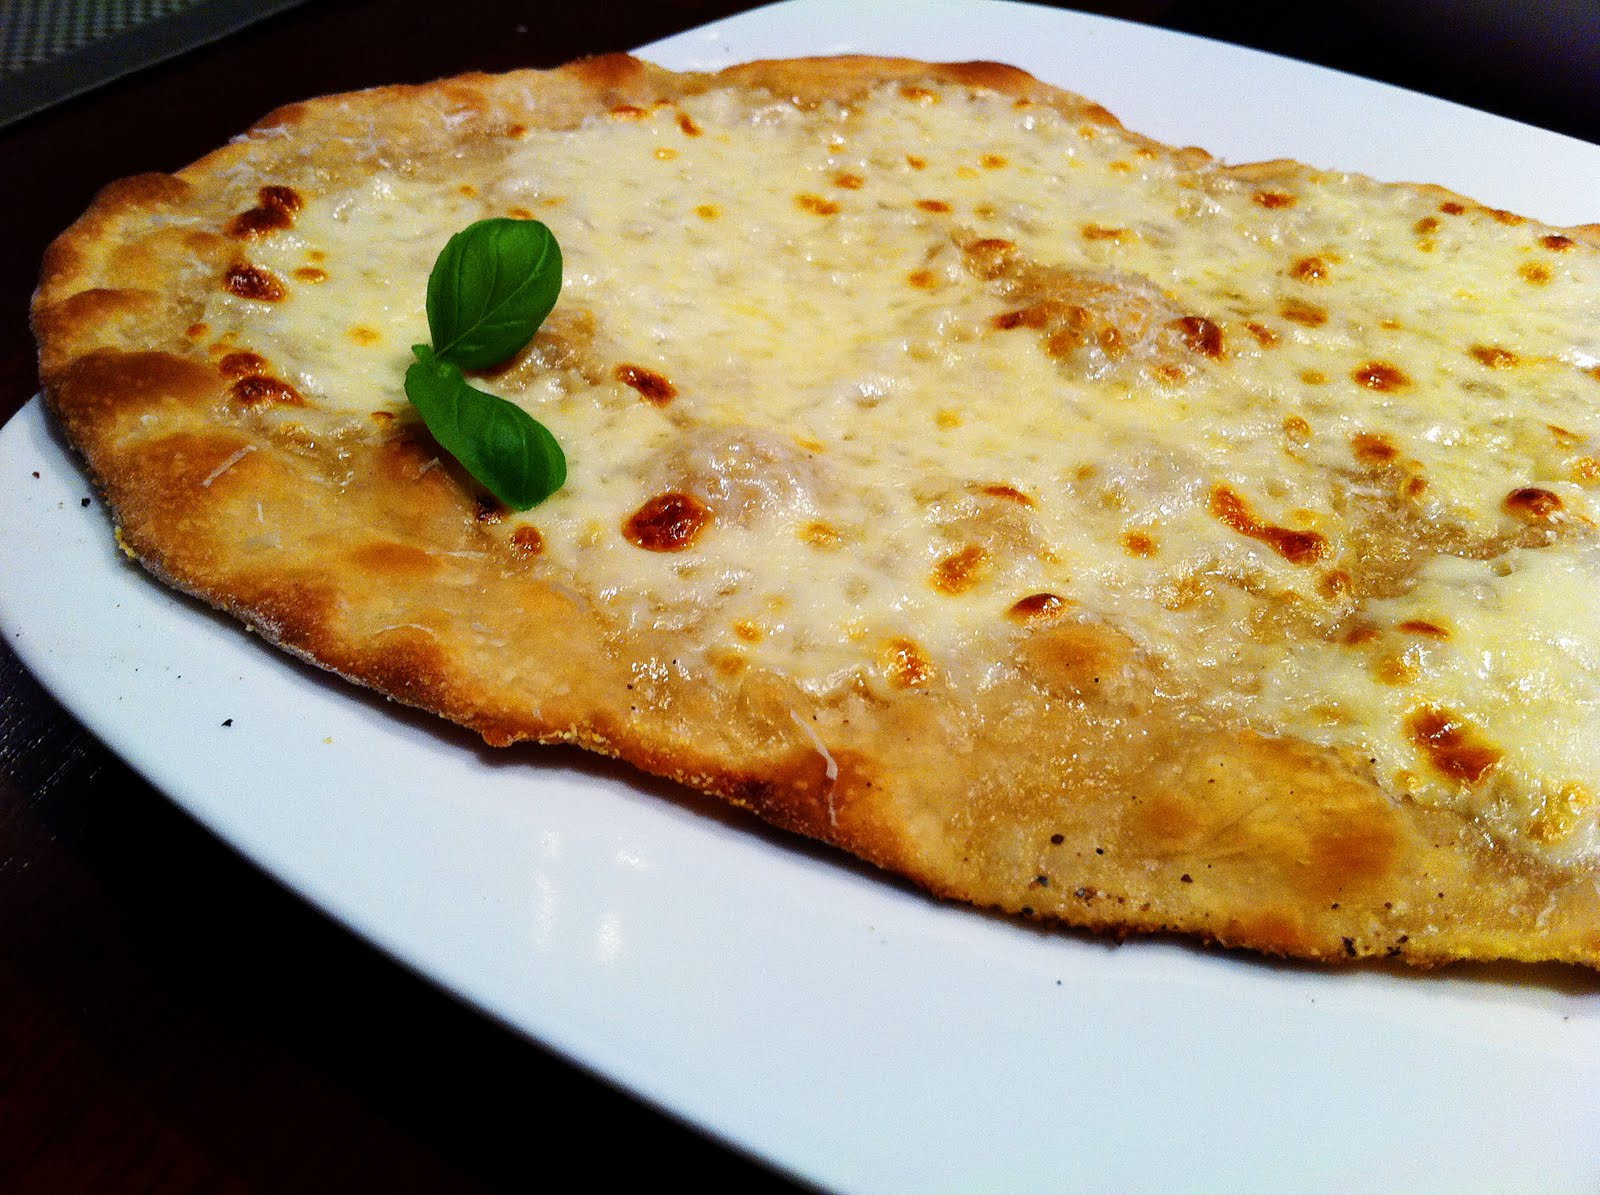
 i made pizza dough this weekend, but forgot pictures. so i'll just give you the recipe.


From Food Network Magazine: (Italian issue)

you will need:

    1 1/3 cup warm (105 degrees) water
    1 packet (2 1/4 tsp) active dry or instant yeast (I've tried both)
    1 TB sugar
    3 TB olive oil, plus more for brushing
    3 3/4 c flour, plus more for dusting
    1 1/2 tsp kosher salt

Sprinkle sugar in bowl with the warm water, stir to dissolve. Sprinkle yeast packet on top, let rest 10 minutes, until foamy. Stir in olive oil.

Combine flour and salt, pour in yeast mixture and mix with a wooden spoon to make dough ball.

Dump ball onto a floured surface, and knead for a few minutes--until lumps are gone. Form 2 balls. Brush 2 large bowls with oil, add one ball of dough to each, cover with plastic wrap, and let rise for 1-2 hours (until doubled in size). Roll out and bake at 500 with toppings, or wrap tightly in plastic and freeze in a ziplock. (this works extremely well! just take out to thaw in fridge before rolling out as usual)


brownie pudding
 saturday evening i was craving something chocolatey and delicious, so of course i whipped up Ina's brownie pudding. (she doesn't actually call it this in her book, but it's what i have dubbed it--maybe because i saw it online!)


I used hershey's special dark cocoa powder (for the first time ever) and let me tell you...i am never going back! it is incredible. but the 2 sticks of butter and heap of sugar probably help a little.


this pudding is served hot, but since i had leftovers, i tried it cold and i must report it is just as delicious this way--maybe even more so. I've never been a huge fan of hot desserts. especially things that are hot and topped with ice cream. i am a dessert purist; i don't like things mixing. i'd rather have a bowl of ice cream or brownie alone than a brownie hot fudge sundae. i don't get whats so great about it. but this dessert is the mecca of chocolatey baked goodness if that's your thing.

i posted this, and came back to fully explain this dessert. it is gooey and soft and batter like, but it also has a crispy, crunchy perfectly crisp thin crust in top that makes a truly glorious cracking sound when you first pierce it. you will eat about a quart of it. get out the sweatpants and go crazy people!

pound cake batter--yum!!

batter. i want to eat it like this


 next up, for a few birthdays at work, i whipped up a pound cake.


yum!


The recipe is from my beautiful fairy godmother, and I can tell you right now, if you are not lucky enough to have a fairy godmother, I feel sorry for you. she is the most magical and special person I will ever know. and has bestowed upon me the greatest pound cake recipe! :)

Grandma Taylor's Pound Cake


you will need:

    6 eggs at room temperature
    2 sticks of butter, at room temperature
    3 cups flour
    3 cups sugar
    1 cup sour cream ( i don't think it need to be room temp, but i take it out with the other ingredients)
    1/4 tsp baking soda
    1/4 tsp salt
    1 1/2 tsp vanilla (i usually use about this much, just taste to check)
    *1 1/2 tsp extract of choice (I love almond, but you could use lemon, etc)

*note: this is a very large amount, so i would start at 1/2 tsp and taste, adding more if necessary. you don't want it to overwhelm you. especially if you are the only person alive who loves almond extract (ahem, like me) and you will not be the only one consuming this cake.


 Preheat oven to 325. Butter and flour a 12 cup tube pan.

Beat sugar and butter on high speed until fluffy. Add eggs individually, mixing after each. Add flour, salt, soda mixture and sour cream alternately until fully incorporated. Add vanilla and other extract, tasting to be sure of flavors. Pour into tube pan, and bake for 1 1/2 hours. be sure to check doneness at about 1 hour, you don't want to over bake! Cool in pan 10 minutes, turn onto plate. Can be sliced and stored in airtight container for a few days. If it lasts that long.


mini sausage and cheddar quiches
sunday i decided to try my hand at mini crustless quiche. i have been seeing lots of these around the food sites and thought it was a great idea for me--easy to eat, individual, easy to reheat! and the convenience of not needing crusts was perfect. i just took my favorite quiche recipe from The Ultimate Southern Living Cookbook (page 202 if you were wondering!) and subtracted the crust, and fiddled with the temperature/bake time. this part was not as successful as i would have hoped--they turned out fine, but not as brown and "done" as i would have liked (and as i have seen in others' photos). the normal recipe calls for a bake time of 50 minutes at 325, so i just shortened the time.

I think the real solution is the bake at 400 for about 15-20 minutes. The higher heat will give you that browned edge i so adore. besides that they were great and so fun! and i ate a few for breakfast one morning--it was perfect! like a mini omelet. just microwave for 45 seconds to a minute.

you will need:

    1 pound Jimmy Dean Hot roll sausage (any really, but the Hot has great flavor and is not spicy)
    1 1/2 c (6 oz) shredded cheddar cheese
    1/2 c chopped onion
    1/4 c chopped bell pepper
    1/2 tsp dried basil
    1/8 tsp garlic powder
    4 large eggs
    1 cup milk
    dash paprika


Brown sausage, drain, cool. combine sausage, cheese, onion, pepper, basil, garlic powder and paprika in a bowl and mix. Crack 4 eggs in a bowl, whisk, add milk, whisk. With an ice cream scoop or spoon, spoon about 1 TB of sausage mixture into each cup of a greased muffin tin. (just make sure they aren't overflowing with filling) Pour a splash of egg mixture in each filled cup, being sure not to overflow. Bake at 400 for 15 minutes, check and bake a few minutes more if needed.


there you have it. i am exhausted just retelling it all to you. happy baking.

Wednesday, May 4, 2011

sloth

this applies not only to my pathetic lack of motivation to share with everyone the gripping and thrilling daily noshes i consume, but also to my limited exercise. a few dinners piled up and then the daunting idea of doing so many recipes discouraged me--knocked my resolve out like a light breeze to a stack of cards.

so i've decided to just post the pictures i've still be steadily taking! and hopefully get it together enough to throw some recipes your way soon!

*note: i also made this yummy low carb lasagna that uses zucchini slices in place of noodles and I KNOW it sounds weird and you're thinking, "whatever kristina, you are full of garbage. there's no way that tastes good, much less like yummy lasagna." and to YOU i say, NAY. it was great! it was lasagna-y, cheesy (go heavy on the cheese layer, i did not have enough) and the portions are enormous and you still have room left for ice cream/oreos/whatever junk you bought after work that you knew you shouldn't but did anyway because hey nutty bars are awesome.  (i also forgot to photograph it which is why i mentioned it at all)

all these recipes were great, so try em. love em. and do yourself a favor and only make sausage balls when you go to a party--or else you will be standing alone in your kitchen at 9 pm watching Funny Girl and "putting them into containers for later" a.k.a. "eating every other one (or every one) you touch, leaving you with 3" and once they (or it) is stowed away safely, turn on P90x and get busy because you just ate yourself a pound of ground sausage and a block o cheese my friend!


my little basil plant!*

cheesy burritos! recipe from dashingdish.com
  recipe here
homemade pizza rolls--recipe from dashingdish.com     
  recipe here
sausage balls. delish; for our will and kate party

sauteed green beans, carrots, red bell pepper
 i would like to note the above veggies are divine and really have no recipe. but i feel obligated to tell you how to make them.

blanch some green beans and sliced carrots for a few minutes, and plunge into an ice bath to stop the cooking. heat olive oil and pressed garlic in a pan, add sliced bell pepper (red is the prettiest color and its sweetness goes nicely, rather than the green variety) and cook for a few minutes to soften. add gr beans and carrots, saute for a few minutes, sprinkle with THIS IS THE CRITICAL STEP tony chacheres and enjoy yourself the best damn veggies out there.

*white pizza (homemade dough!) note basil
 this pizza dough recipe is from food network magazine. it was wonderful, and surprisingly easier to deal with after being frozen, and thawed in the fridge. the perfect crispy thin crust!! note rules on baking from the margherita pizza post. oh and yes, since you were wondering, i did grow that basil leaf ALL BY MYSELF!
royal wedding work party invite
 oh yes, we had a royal wedding party full of only British foods the day of the nuptials!
royal wedding work party invite

royal wedding work party invite

royal wedding work party
 note flags with will and kate
royal wedding work party
there were many strange things here: marmite (yeast extract? ew, it's as awful as it sounds. i tried it), Branston pickle sandwiches (gross, google it. foulll), cucumber sandwiches, but i hate cucumber. DIDJA KNOW THAT ONE?! i do..

let's just say the sausage balls were a hit. and the scones, the maker of which also MADE HER OWN BUTTER. way to make us all look bad, i say. she is super sweet so it was hard to be angry,

Saturday, April 16, 2011

comfort food, harry potter, resolutions.

ina garten's chicken stew with biscuits.
last night my lovely neighbors came over to help me prepare a delicious feast. now, the more cynical of you may challenge: "um, kristina, one dish is not a feast." and to you i say, obviously you have not had Ina's (the Barefoot Contessa for non-Food Network viewers or those of you living in the mountains in caves) chicken stew with biscuits. Not only is it hearty, buttery and delicious, the damn thing weighs in at about...6 pounds. this is a guesstimation, but cannot be far off; i am rather fit and strong and i had trouble pulling it out of the oven and placing it on my stove.

it is not something you would want to make:

1. on a night when you only have 30 minutes to round up whatever is in your fridge for dinner
2. when it is over 75 degrees out
3. if you are on any sort of diet or have concerns about consuming a dish containing 3 sticks of butter
4. if your goal in life is to eat cardboard to stay thin rather than eat deliciously
5. if you have been ignoring your push-ups--you'll need some upper body gusto to drag this thing outta the oven

i would not say it is a complex recipe to execute, but i will say it is time consuming--prep would be about 30-40 minutes, cook time about 45--and you will use every dish, utensil, and gadget in your kitchen, therefore leaving you with a mountain of floury, stew-y, crusted things to wash afterwards. (this will be impossible without help because you will be in a food coma after consuming.)

serves 8-12

you will need:


  • 3 whole (6 split) chicken breasts, bone in, skin on (or 1 whole pre-roasted chicken from your grocery store, with all the meat shredded)
  • 3 tablespoons olive oil
  • Kosher salt and freshly ground black pepper
  • 5 cups chicken stock, preferably homemade (for those of us without 3 freezers to store Ina's 6 quarts of stock, Kitchen Basics brand is best)
  • 2 chicken bouillon cubes--i forgot these
  • 12 tablespoons (1 1/2 sticks) unsalted butter
  • 2 cups chopped yellow onions (2 onions)
  • 3/4 cup flour
  • 1/4 cup heavy cream (i used half and half)
  • 2 cups medium-diced carrots (4 carrots), blanched for 2 minutes (forgot to blanch)
  • 1 10-ounce package frozen peas (2 cups)
  • 1 1/2 cups frozen small whole onions (< ^ this is a lot of onions, folks. i now use green beans instead)
  • 1/2 cup minced fresh parsley

For the biscuits:

  • 2 cups flour
  • 1 tablespoon baking powder
  • 1 teaspoon kosher salt
  • 1 teaspoon sugar
  • 1/4 pound (1 stick) cold unsalted butter, diced
  • 3/4 cup half-and-half
  • 1/2 cup chopped fresh parsley
  • 1 egg mixed with 1 tablespoon water, for egg wash

preheat your oven to 375.

if you are roasting chicken breasts, place on a large sheet pan, rub with the olive oil, generously sprinkle with salt and pepper. roast for 35-45 minutes, set aside to cool, and shred the meat. if you want to save time and got a whole pre-roasted bird (like i do) shred all the meat and set aside.

now, you want to get a medium sized pot to heat your chicken stock in. heat it on medium low heat and let it get warm, also here is where you would add bouillon cubes if you remember.

in a very big pot--seriously, get the biggest one you have (not a 12 quart stock pot, but a big ole pot) melt the 1 and a 1/2 sticks of butter. when it is melted, add the chopped onions and let soften. this will take about 10+ minutes. while they are cooking, blanche your carrots (and green beans if using) in boiling water (see how many pots you're using already?!).

add the flour to the butter onion mixture and cook on low heat for 2 minutes, stirring constantly. you want this to get very thick, and you need to try not to salivate IN the pot. strap a cup to your chin--do what you gotta do. now pour in the chicken stock, and simmer for another minute or so, stirring to combine.

now stir in 2 tsp salt, and 1/2 tsp pepper along with the heavy cream or half and half. add the chicken, carrots, green beans, peas and parsley and mix well. pour this super thick and heavy stew into a very large pan. the biggest size i had was 13" x 9" x 2", this will work but it will be filled to the brim. place your pan on a baking sheet and bake for 15 minutes.

while the stew is cooking, make your biscuits. and if you have extra hands, get them washing!! combine salt, sugar, flour and baking powder in the bowl for your mixer--Ina says use the paddle attachment--i say my mixer is like 25+ years old and i dont got one-a-those, so just use your normal beaters. add in the butter and mix until the butter is chopped up into bits the size of peas. add half and half and mix on low speed until combined. scrape the bottom and sides of your bowl with a rubber spatula, or if you have an old mixer, you will have to stop 3 times during this process to peel the dough out of the beaters because it will all get stuck and rise out the top like a dough volcano. once mixed, add parsley and beat a few more seconds.

flour your work surface and plop the dough down. here is where we separate the men from the boys (and no i don't care about saying men instead of women because who the heck does...its an expression, not a statement of women's inability to whatever...) if you own a rolling pin, roll out your dough to less than an inch thick. if like me all you own is your wits (most days) and your hands, press the dough out as evenly as you can. now, all you fancy folk can take out your shiny biscuit cutters (1 1/2") and cut out as many biscuits as you can--for us common folk, grab a cup with a nice thin edge and do the same.

you probably had to take the stew out of the oven at this point, so take the biscuits (that i know you remembered to egg wash**) and arrange them atop the stewy goodness. bake for 30 more minutes and digg in!
**ok--for those of you who did not egg wash because i didn't explain it--after you cut out the biscuits, crack your egg in a bowl and add 1 Tb water, whisk. brush (or use your fingers) to coat the tops of the biscuits with the egg mixture then place on top of stew and bake. it gives them that nice goldeny color!

if you're real smart, you'll have a great movie (harry potter and the deathly hallows part 1) in your dvd player, ready to play as you sit down and enjoy your delicious feast!


PS-- the "resolutions" part of this post is this--i really need to step up my photography game. honestly, i never remember to take the pictures of my meals until i've already eaten some (or all) of what on my plate, then i have to go back and get more and pretend like i didnt eat it all. i also do not have the luxury of cooking during day light hours more often than not, so the yellow-y light is a problem. and since i forget to snap shots until the last second, i dump some food on a plate and click without any real thought of where i'm putting my plate (like all the pretty grey countertop and carpet backdrops?!) and this results in just ugly photos. i will try to be better at making the food look good so you will actually want to make it instead of thinking....um...yeah i'm not cooking that.

Wednesday, April 13, 2011

food pics!

in college, inspiration was a huge topic of conversation. as an artist of any kind, you need to be inspired. it is that first critical step in the design/art making process. it is very hard to create work (of any kind, much less beautiful work) without having that spark of an idea, something that makes you go "oh! i love _______, i want to do/make/paint/draw something like that" and then in a tornado of excitement the work can kind of pour out of you. this is on a very good, highly motivated day, mind you.

personally, i find inspiration everywhere. from food, to fashion, interior design, graphics and typography, nature and gardens, photography...its all over. to help reign in the images i find that inspire me, mood boards are helpful. this started in college as a way to express an idea for a collection of prints and now at my job i pretty much do exactly the same thing. since i have a few folders of over a thousand inspiring images, it helps to organize everything. (which, i have not done. completely. or really at all when it comes to filing these images. its a project i need to start!)

here are some delicious and beautiful pics i have come across in the last several years. i don't have specific "cite" info for them, but all were found on pinterest.com, ffffound.com, or creaturecomfortsblog.com

Chicken Salad in Avocado

jewel carrots

dark chocolate panini. omg

lemonade

green pasta. this was like some sort of herb pesto-y dish

key lime fudge

this is how i would eat lucky charms too

mmm mac and cheese!

macarons. which i have never tried, but see images of them everywhere

melons in a lime bowl

lasagna cups

can't wait for peach season! 

pretty pears

i thought this crust was so cool! even though i don't like most pies

i want to know what this frosting is!

and what makes this so pink

this looks delicious, and i wish i had some

never seen a turq cupcake

crudite

white strawberries?

:( someday i will have one

i want this every sunday for...forever. or waffles, i secretly like them better

i think this is such a pretty cake!
i have MANY cake photos i will share later on, mostly wedding cakes. but they are all so pretty and impressive.

now go eat something gooood.

Tuesday, April 12, 2011

a note on chocolate chip cookies.

in this post, i said i wanted to try the chocolate chip cookie recipe.

well, i did. during my week from hell two weeks ago, i prepared the dough and refrigerated it for 36 hours (longer than it said to but i couldnt make them until then) and they turned out, well, awful.


i was to say the least, very disappointed. the post i found the recipe at (link above) said how amazing these cookies were and blah blah on and on. i must have screwed something up along the way but mine, baked on a pizza brick/baking stone for several minutes longer than called for still turned out gooey--and not in a good way. so gooey that after sitting out of the oven for a few minutes, they drooped pathetically into piles of goosh off the end of my spatula before i could even attempt to place them on a cooling rack. i tried 2 different times to bake these, both times with utter failure.

this has never happened to me before. i don't know what happened but all i can say is i felt jipped and i'll never get that flour back. and now all i want to do is make my normal cookie recipe, which as it happens is delicious and always comes out perfect.

i'm going to need to do a lot more of that exercise junk if i'm going to be eating decadent baked spaghetti and cookies...

mmmm.

so things around here have calmed down. put away the guest bed, did (most) of the laundry, picked up the approximiately 1,239 tissues littering the  house, car, my desk at work....and the three, yes three empty tissue boxes from last week. it's been a long journey, filled with freezer burned bagel bites, cereal, and boxed macaroni (with hot dogs, obviously). not that i'm complaining, i do love me some mac and dogs, ask anyone.

so after this verryy long stretch of getting myself together and making my dwelling fit for others (because really, if you're house is so gross you wouldn't want a close friend or relative taking too close a stock of the situation, it's time to clean. you deserve the same cleanliness as your guests, or cat or whatever..) i finally cooked a meal! it was different. i used many more dishes than i would have done say, a week ago.

i will compare it to something akin to missing your workouts for almost two weeks (because hey! i did that too, and this morning's dive back into fitness was not pretty, nor very coordinated. i'll pretend it was because it was 6 am) when you work out fairly regularly for a month or so then stop completely for half that time...getting going again is hard. like, i did half of my normal workout and let's just say i didn't give it my all, or even my half? i was dying, gulping water, stopming around and bending over, hands on knees WAY more than is necesary. i think it's harder to get back into a workout routine if you've only slacked a little than it would be if you started from scratch with nothing under your belt. it's like your body knows what it SHOULD be doing, what it is capable of and is so confused by your inability to get yourself to that previous peak that you just kind of stumble around in a twisty haze.

this was similar to my last two nights of cooking. while both meals turned out fine, i did dumb things that made no sense. i got out some but not all the ingredients, or i didn't chop the right thing or couldn't remember what directions i read long enough to complete them and used 4 different spoons in my attempts to get the food from pot to oven. mannny dishes here, and i don't have a dish rack (really need to get one!) so my dishes sit in a weird, very precarious pyramid on my drying mat. that stays full of dry dishes until i have already washed the next batch and have no where to put them.


so anyway, i made cashew chicken salad last night, and tonight made this pot of deliciousness:

baked spaghetti

i found the recipe at How Sweet Eats. and it was awesome.


(please ignore the fact that her pictures are amazing and mine is...well. substantially less melty, which is what makes it look so divine. i added parsley!)

serves 4-6

you will need:


    3/4 pound whole wheat spaghetti
    1/2 onion, chopped
    3 cloves garlic, minced
    1 tablespoon olive oil
    1 1/4 pounds ground beef (I used 93% lean)
    1 teaspoon salt
    1 teaspoon pepper
    10-12 fresh basil leaves, chopped
    2 cups of your favorite pasta sauce
    1 cup shredded mozzarella cheese
    1/2 cup freshly grated parmesan cheese

as usual, i decreased the quantity of everything, and measured like...nothing. but it was still great!


preheat your oven to 350.

boil spaghetti about 3 or so minutes LESS than the box says, because it will be cooking the rest of the way in the oven. drain it and set it aside.

heat your olive oil up in a pan on medium high heat, add onions (i also added chopped fresh mushrooms here because i needed to use them--very good) and saute for several minutes, until softened. i also just realized i did not use any garlic, i just plain forgot. see what i mean about not cooking for a while?! madness.

anyhow, you would add the garlic to the pan and saute for a minute at this point, then add the ground beef and the salt and pepper. the let meat brown up and then drain the fat off, because if you don't, well that's just gross. trust me, i've been there. some people don't drain the fat off, and it is not a desirable situation to be in people.

take that bowl of cooked spag (i always find it fun/funny to say this instead of spaghetti.) and add the meat and 1 cup of whatever tomato sauce you chose. also the basil. i did not have basil, and therefore stirred in a dollop of pesto. because i am a master chef who is cool under pressure and limited supplies. (ignore the fact that i did not add the garlic, which in fact i did have. irrelevant)

find a baking dish, i used "the green bean dish" which, obviously, is the dish my grandmother made green beans in every year at thanksgiving and christmas for forever. it is a round dish that is 3-4" deep and 7-8" in diameter. spread a layer of the spaghetti mixture in the bottom, top with some sauce, parmesan and mozzarella cheese (i had fresh, so i froze it for 20 minutes while i prepped everything else and sliced it very thin, and i recommend this. because fresh mozzarella is the most amazing cheese ever.) the freezing is to harden it enough to get those thin slices, because it is a very soft cheese. in case you don't use it or didn't know you could do that.

add another layer of spaghetti and repeat the above process. pop the dish in the oven for 20 minutes (you could also broil for a few minutes at the end to make your cheese brown and bubbly) and then dig in and make sure your elastic pants are close by. also a napkin and some garlicky garlic bread, which sadly i did not have. but it would be yumyumyum!

Wednesday, April 6, 2011

it's very surprising...

...how dirty my kitchen can stay when i haven't cooked a meal in it in over a week. between last week's terrifyingly late (12:30 am and 10 pm respectively) nights, the weekend's company, and the senses-obliterating allergies/cold i now am wrestling, all i have made lately is a pot of tomato soup. out of necessity, because everyone needs soup when they are home sick, and since my momma is 13 hours away...welp, i had to hike up my (sweatshirt)sleeves, pull back my (unwashed)hair, clean off my (wet/snotty/used tissues-strewn) countertop and go to work.

i do feel the need to explain that i did attempt cooking a meal over the weekend for my lovely guests, but it was a failure of epic proportions. let me preface this 12 part miniseries by saying i love roast chicken. it is delicious and juicy and i love the crispy skin and i love making BBQ sandwiches out of the leftover shredded meat and eating them with sam.

now for a confession: i have never successfully made roast chicken. ever. i did "help" momma make one one lovely sunday (who the hell knows what day of the week it was, i am guessing a sunday because it sounds nice and feasible) and granny and pawpaw came over and we ate carrot souffle and it was all very nice. and by "help" i mean i rubbed butter on its' skin and sprinkled salt and pepper on it. she handled the yanking-out-the-guts, washing its insides business because...well its just disgusting. i don't like raw meat, and if i thought resigning myself to a vegetarian lifestyle was a reasonable option, i wouldn't eat meat at all. i believe at some point i have discussed my distaste for most meat, although i eat chicken and turkey with the occasional ground beef thrown in. to be honest, if i have not ingested meat in a while, those first few bites (or meals) kind of gross me out. especially chicken. i don't know why this is, but i have my suspicions.

it began in 9th grade in mr. gambon's biology class. who knew it would be a critical life lesson-type moment, and that 8 (dear god i'm getting old..) years later i would remember it clearly. he told us meat was muscles. now...i know i am opening myself up to ludicrous ridicule with this revelation, but here it goes: i never knew the meat we eat was muscles. maybe somewhere deep inside my subconscious i realized this fact (i think it must have been self preservation that kept this knowledge from drifting to the surface), but seriously what teenager thinks about A. what they are eating B. where it came from C. whether or not it is some vital organ. i don't like thinking about my meat. anyone who has eaten with me or within a 5 mile radius of me has probably heard someone making fun of how i pick apart my meat, removing the gluey, gummy gel-like substance that i do not want to consciously identify and the offending veins and sometimes TENDONS. gross, who wants to eat that junk?! no one. people who can suck chicken wings dry in one fowl swoop (i am looking at you SAM) just must not realize how many foreign objects they are ingesting into their bodies. it's bad enough that we eat muscles, no other tissues please.


back to the roast chicken story.....

so i don't like touching raw meat because of aforementioned reasons #1-5687. so yeah, all i did to that big nasty gutless bird was rub it a little, and let me tell ya if it wasn't a little squishy (pretty much my only fascination with meat, ask mom) i wouldn't be touching it at all.

the whole prospect of roasting an entire animal is just so daunting. you have to search from the bakery to the clorox aisle at the grocery store to find one that isn't 12 pounds (what are they DOING to these birds?!), then if you do find one that's somewhere between a game hen and an ostrich you gotta make sure it isn't frozen solid. (obviously it will be, why do you think no one else swooped in to buy the only bird small enough the fit in a trunk). SO, if you find a bird and its frozen you have to thaw it for about a month in your fridge, and OH since there aren't any normal sized ones, the rest of your fridge's contents are: that 15 year old box of baking soda at the back you're half sure came pre-assembled inside the unit and a container with half a can of beans in it. (i can never seem to use a whole can of beans, so this is the other constant in my fridge life)

so you have no food because your fridge can't fit anything, you've been starving for weeks waiting for the bird to thaw....it's been a rough ride people. roasting chickens is a month-long commitment. once its thawed, cleaned, rinsed, stuffed with whatever squashed veggies you threw it on in the fridge, and ready to be roasted....oh yeah. you need a roasting pan and rack. this for me is very frustrating, because these cost about a million dollars and don't fit ANYWHERE and since you never roast stupid chickens because they are such a pain in the butt....you see my point.
 no one has one, except ina garten, martha stewart and God. God probably has one. He is God afterall...maybe God hates roasting chickens too. rightly so.

if you are still alive after the last 3 weeks of preparation and anticipation for your birdie, you have to decide which lying cookbook author to believe. "Bake at 425 for 1 hour and 30 minutes" "Start at 425 for 20 minutes, reduce heat to 325 and cook for 6 more hours" or my personal favorite, from the lovely Julia. "Bake breast up at 425 for 15 minutes, turning to the left side after 5 minutes, then to the right side for the last 5 minutes, AND basting it with butter and oil after each turn"......obviously i stopped reading here, and cried for an hour. and the damn chicken probably wouldn't even be WARM by the time this ridiculousness was over, much less cooked.....you basically baste and turn the stupid thing every 30 seconds for hours on end. if you were curious, this was what P90x looked like before tony came along.

so to finally get to the story of my failed attempt(s) this weekend, here are the facts:

1. whole chickens were BOGO at giant eagle (my sad excuse for a publix here in ohio)
2. i selected two
3. the smallest bird was over 5 pounds, the next smallest, 6 pounds. (why i didn't walk away here, i  don't know)
4. i tried roasting the small (ha!) one, and over cooked it, shredded the meat, and never ate any (but not on purpose)
5. i froze the other one, and put it in my fridge to defrost on tuesday morning.
6. saturday evening it was still frozen solid inside--like can't-rip-out-the-bag-o-guts-out frozen
7. sunday, after leaving it in the sink for 45 minutes to thaw, i shoved some junk around it and cooked it at 425 for 20 minutes, then for 325 for 2 hours.

....and still it was not cooked. the thigh (although my meat thermometer registered a perfect 165 degrees) was slowly leaking pinky juices. so we threw it back in, but i don't know for how long.

note: it is now about 10:30 pm

and the damn bird that wouldn't thaw now wouldn't cook. and so you know what i did? i threw it in the trash and went to bed. i am ashamed of myself for wasting an entire chicken (ok, 2, since i never ate the other--i'm only one person!) but i was not having anymore of this garbage.


now i have to get a sam's club membership just to buy their $5 roast chickens twice every 6 months.

i think the correlation between this debacle and my illness (and now, throbbing headache) is obvious.

reliving this experience has sucked all the lifeblood out of me, and i will now crawl in my bed and sleep the peaceful sleep of one who will never roast a chicken again.

Wednesday, March 30, 2011

my first dinner in a few days...

...is boxed macaroni and cheese with hot dogs, because although i like cooking fun things i still like eating like a 5 year old. it's been a crazy week at work. monday night my team was there until after 12:30 am and tuesday night we snuck out by 9:45. i think the storm has passed and the next two days should be better, tonight i got out at a normal time which has left me with hours with which i no longer remember how to fill.

i have super special guests coming in this weekend, (coupled with my extra super special guest last weekend!) and am hoping to roast a delicious chicken. hoping to cook a little over the weekend.

Thursday, March 24, 2011

who knew an electric stove could catch fire?!

Caramelized Chicken and Pappardelle with Spinach, Herbs and Ricotta

things are gettin' fancy round here now that momma's here to help! we discussed many meal options and for tonight decided on the two dishes above. i had never had pappardelle (wide egg noodles) but they were really good, and while the pasta has ricotta and parmesean its very light.

the chicken recipe comes from Tasty Kitchen via How Sweet Eats--it tasted delicious but i think i may have slightly overcooked the mushrooms and my sauce didn't really thicken--i had to sprinkle in some Wondra flour.

the pappardelle was from the april issue of cooking light--as a note you probably want to make the pasta first, then make the chicken if you are making them together.

chicken

you will need:  (this says it serves two, but....it doesnt)
  • 4 whole Thinly Sliced, Boneless Skinless Chicken Breasts
  • ⅓ cups All-purpose Flour
  • 2 Tablespoons Olive Oil
  • ¼ whole Onion, Chopped
  • 2 cups Sliced Mushrooms
  • 3 Tablespoons Butter
  • ⅓ cups White Wine
first sprinkle the chicken cutlets with salt and pepper on both sides, then lightly coat with flour. (this should be a thin layer, not a breading)
heat the olive oil in your skillet and cook chicken for a few minutes on each side, until brown.

place cooked chicken on a plate, add 1 TB butter to pan and cook onions for a minute or so. add the rest of the butter and saute mushrooms for about 5 minutes, until soft. pour wine in the pan and scrape (deglaze) the brown bits off the bottom, and add the chicken back into the sauce.

serve hot!


pappardelle

you will need: (serves 4, 1 3/4 c serving size!) obviously this is if you eat it by itself...

    8 oz uncooked pappardelle
    1 TB kosher salt
    1/3 c ricotta cheese
    3 cups baby spinach
    1/4 c chopped fresh chives (we used green onions because thats what i had)
    1/4 c chopped fresh flat leaf parsley
    1/4 c chopped fresh dill (we omitted this--i dont like dill)
    3 TB fresh grated parmesan cheese
    2 TB olive oil
    1/2 t fresh ground pepper

cook pasta with 1 TB salt, dont add oil if the package says to--the sauce won't stick. and never rinse pasta either, just in general. don't do it!

drain and reserve 1 c of the cooking liquid, combine 1/2 c hot liquid with ricotta in a blender until mixed. toss hot pasta with the ricotta mixture and the remaining ingredients, adding extra cooking liquid if it's too dry.


by the way, while heating the pot of pasta water, the burner underneath exploded into flames, several times. it was horrifying and mysterious.


now it's dessert time! yumyumyum.