Monday, August 8, 2011

whole wheat blueberry pancakes

so cute!
This recipe comes from Rocco DiSpirito's book Now Eat This! these are made with whole wheat pastry flour, which i have used a few times now and really like! It's protein content is lower than whole wheat flour, which enables it to acheieve that lighter, fluffier texture that you'd want for say, pancakes or a muffin. Whole wheat flour is still fine for more heavy duty breads and doughs, and I have even used it in my oatmeal chocolate chip cookies--it was delicious!

one note about this recipe--i would probably add a bit of cinnamon to really perk the flavor up, and at the time I didn't have stevia, so i kind of threw in a random (not enough) amount of Splenda, so they were quite as sweet as i would have liked. i think this can be easily solved, and i have invested in Sweet Leaf stevia. (i first tried it in my coffee at work, thanks A&F cafe!!) it's sweet and natural, but does have a slight aftertaste. Katie, from dashingdish.com recommends NuStevia, which she says she likes best of all the varieties she has tried. I will try that next, you can find it on Amazon if you're interested. (Stevia is an all natural, no calorie sweetner for those of you who don't know what I am talking about)

serves 4 (8 mini pancakes each)

you will need:

    3/4 cup maple syrup (calls for Walden Farms which is calorie free, I used light Log Cabin)
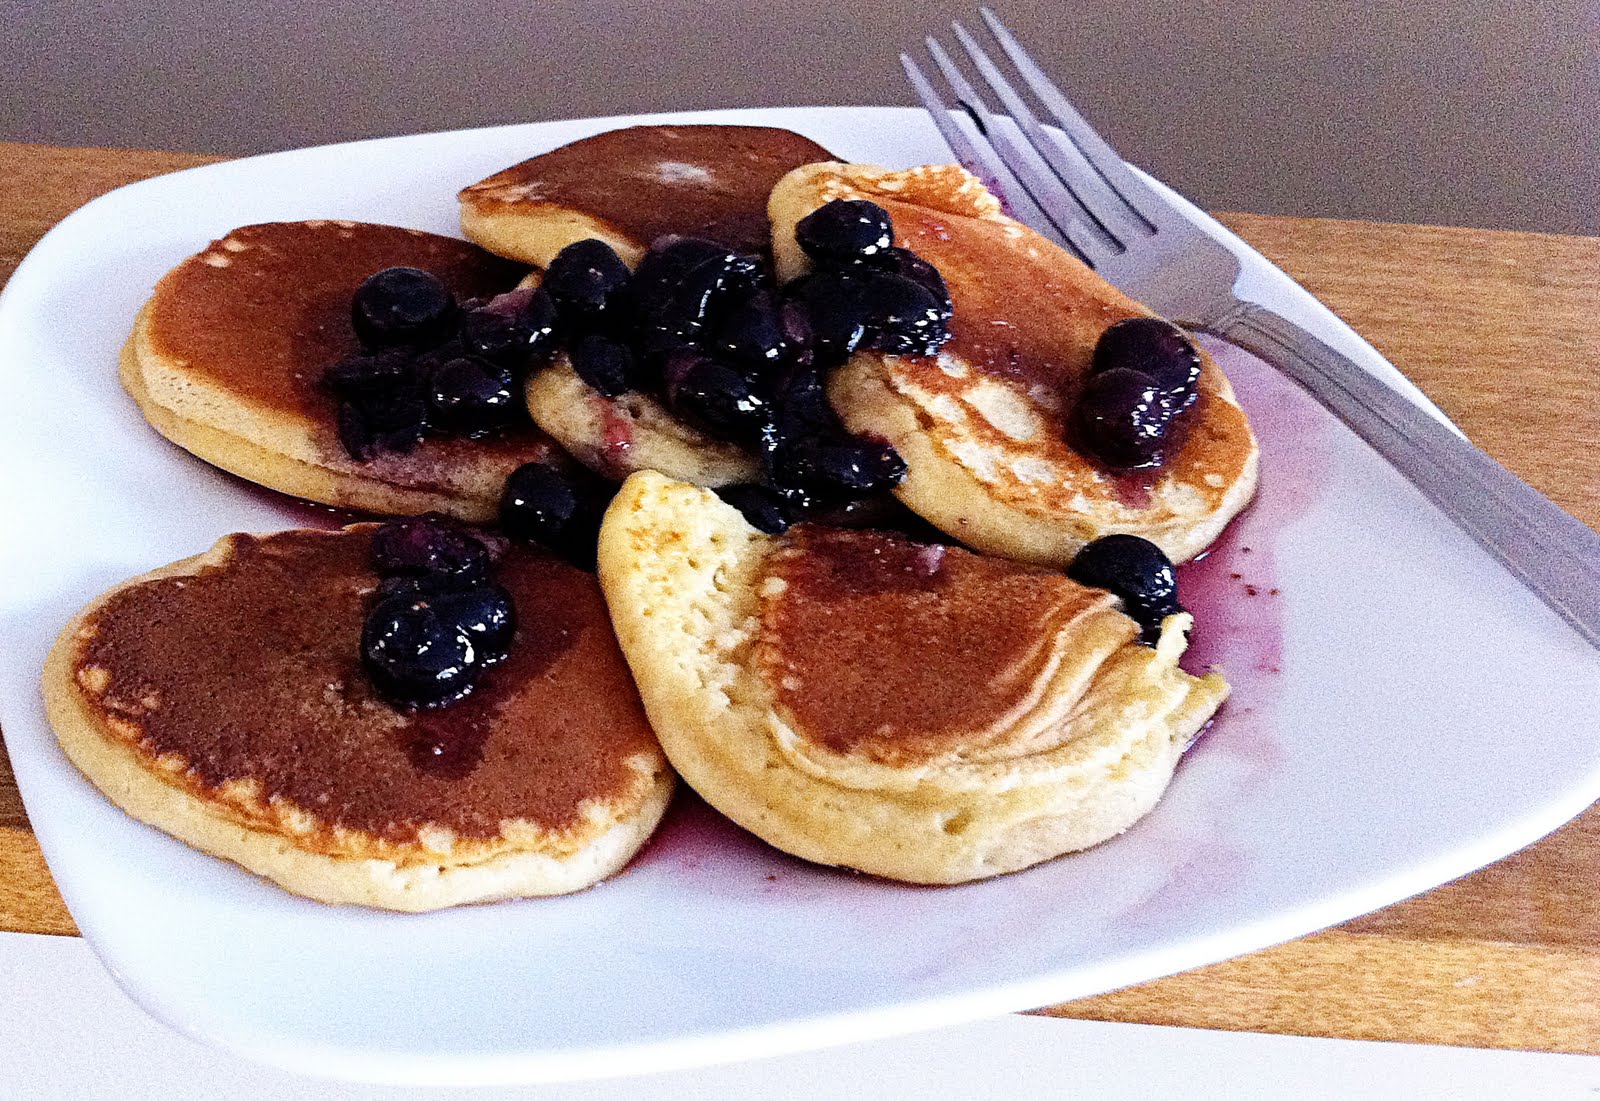
    1 1/2 cups fresh/frozen blueberries
    1 1/2 cups whole wheat pastry flour
    3 1/2 tsp baking powder
    4 packets stevia (or you could try 1-1 1/2 tsp sugar too, as a guesstimate)
    1/2 tsp salt
    1 1/4 cups skim (i like 1%) milk
    1/2 cup liquid egg substitute (i measured 1/2 cup of egg, i think it was only 1 though)
    3 T canola oil

to prepare:

in a small saucepan, heat syrup and 1/2 cup of blueberries. heat over low heat, and mash the blueberries with a spoon to release their juices. warm through, set aside.

mix together flour, baking powder, stevia (or sugar), and salt.

whisk in milk, egg, and oil, just until combined. stir in remaining blueberries

heat your griddle or frying pan over medium/high heat (if water drops sizzle, its ready!) drop tablespoon-fulls of batter onto the pan surface, flipping once edges appear dry and bubbles form on the surface. this happens very quickly since they are so tiny so be watchful.

serve with blueberry syrup and a tall glass of iced milk! (which is the only way to drink milk with proper breakfasts!)

i'll include the nutrition info since it's in the book:

per serving:

calories: 292, fat: 12 grams (1g saturated fat, 7g monounsaturated, 3g polyunsaturated)., 1.5 mg cholesterol, 830 mg sodium, 39 g carbs, 5g fiber, 10 g protein

ice cream ice cream!!

dark chocolate ice cream
So, last week I made a life-altering decision that i am pretty sure will enrich and fulfill my summer nights forever. ....or for a long time.

yes, it's true. I bought a Cuisinart ICE-21 ice cream maker. and it is beautiful, and my new favorite toy! It doesn't require the fuss and mess of salt and ice, however you need enough freezer space to fit the bowl in for a good 12-16 hours. (it contains a liquid that freezes solid) my freezer is tiny and chock full of junk, and it still fit, so i am sure most people will have no problem fitting one in their freezer. It makes 1 1/2 quarts of ice cream, which I loved because it's enough to enjoy for a few weeks but it's not so much that i need to go purchase a superfluous freezer to house all of my delicious creations.

the recipe i used was found via cooking light.com, and let me tell you, it was a winner.

you will need:

    1 1/3 cups sugar
    1/3 cup unsweetened cocoa (I used Hershey's Special Dark, hence the blackness of the ice cream)
    2 1/2 cups 2% reduced-fat milk, divided
    3 large egg yolks
    1/2 cup half-and-half
    2 1/2 ounces bittersweet chocolate, chopped (I had 85% dark chocolate on hand)

to prepare:


Combine sugar and cocoa in a medium, heavy saucepan over medium-low heat. Stir in 1/2 cup milk and egg yolks. Stir in remaining 2 cups milk. Cook 12 minutes or until a thermometer registers 160°, stirring constantly. Remove from heat.

Place half-and-half in a microwave-safe dish; microwave at high 1 1/2 minutes or until half-and-half boils. Add chocolate to half-and-half; stir until smooth. Add half-and-half mixture to pan; stir until smooth. Place pan in an ice-filled bowl. Cool completely, stirring occasionally.

Pour mixture into the freezer can of an ice-cream freezer; freeze according to manufacturer's instructions. Spoon ice cream into a freezer-safe container; cover and freeze 1 hour or until firm.

My ice cream maker froze this stuff to a soft-serve consistency in less than 20 minutes! Like magic.

           
yummy!
Check the link for nutritional info! (a bonus :) )

if you have an ice cream maker and love chocolate more than life, i suggest you make this immediately, so we can talk about how good it is! (by the way, you must eat this in a cone. like, must)


oh hi remember me?!

...maybe you don't. you know, since it's been...i don't know. a long time. months, eons, millenia. (i was pretty sure millenia was a word but its underlined in red....hmm)

it's been a busy time (sometimes), and sometimes i've been lazy. mostly, just lazy.

but i have been cooking! i'll break it up in a few posts so as not to overwhelm my 2 readers.

first up, zucchini noodle lasagna from Dashing Dish!

zucchini lasagna


anyway, you may remember me mentioning this dish in a previous post 
and i didn't have a picture then either. but it's super delicious, and well worth the effort! i would say it's not an easy dish, as the prep required is time consuming, but its so yummy that everyone should try it anyway.

when I re-attempted this dish, it was via Skype with my mom, we had a little cooking date and made it together :) It's not as good as being home with my family, but it's still nice to be able to see them and share meals together. 

you will need:

For the Noodles:
  • 6 large zucchini, cut lengthwise into 1/8 inch strips, should resemble thick lasagna type “noodles”
For the Meat Sauce:
  • 1.25 lb lean ground turkey meat (you could also leave this out and make to make a vegetarian version!)
  • 1 large onion, diced
  • 2 cups fresh or frozen broccoli (or 2 cups of another veggie of choice)
  • 2 cups fresh or frozen cauliflower (or 2 cups of another veggie of choice)
  • 2 cups fresh or frozen chopped spinach (or 2 cups of another veggie of choice)
  • 1 (25 ounce) jar of spaghetti sauce (I used one with 70 calories per 1/2 cup serving)
  • 1 tbs garlic powder (or 1 clove garlic, minced)
  • Pinch of salt and pepper, or to taste
  • *Optional seasoning: 2 tbs of Italian Seasoning
For the Cheese Layer:
  • 1 (16 ounce) container light cottage cheese (or light ricotta cheese)
  • 1/2 cup grated parmesan cheese
  • 3/4 cup shredded mozzarella cheese
to assemble:


  1. For the noodle layer: Preheat oven to 425 degrees. Spray a cookie sheet with non-stick cooking spray, arrange zucchini slices and season with salt and pepper. Bake zucchini slices for 5 minutes on each side, then remove from oven. Set zucchini slices aside and lower oven temperature to 375 degrees.
  2. For the meat sauce layer: In a large non-stick skillet, cook meat until it’s browned. To the skillet, add the veggies, seasonings, and the entire jar of spaghetti sauce. Simmer for about 10 minutes, (or until veggies are de-thawed/begin to soften), stirring occasionally.
  3. For the cheesy layer: Mix the cottage cheese and parmesan cheese together, ( this can be done right in the cottage cheese container!)
  4. Put it all together: Spray a 9×13 baking dish with non-stick cooking spray. Begin by spreading 1/3 of the meat sauce in the bottom of the pan. Follow meat sauce with a layer of zucchini slices, followed by a layer of cottage cheese. Repeat the layers until casserole dish is full.
  5. Finish it off: Sprinkle the mozzarella evenly over the top. Cover with foil and bake at 375 degrees for 1 hour.
  6. Remove foil and bake or broil another 5-10 minutes until cheese is browned. Remove from oven and let rest for about 10 minutes before slicing, and serve warm!
worth every minute of prep time! it freezes well (after being cooked), and since i made an entire 13x9 pan i froze about half the dish in individual containers for quick easy lunches. i love this dish because it's full of vegetables, has lots of cheesiness and rich flavor, and still has the feel of a traditional lasagna from the hearty meat sauce!